


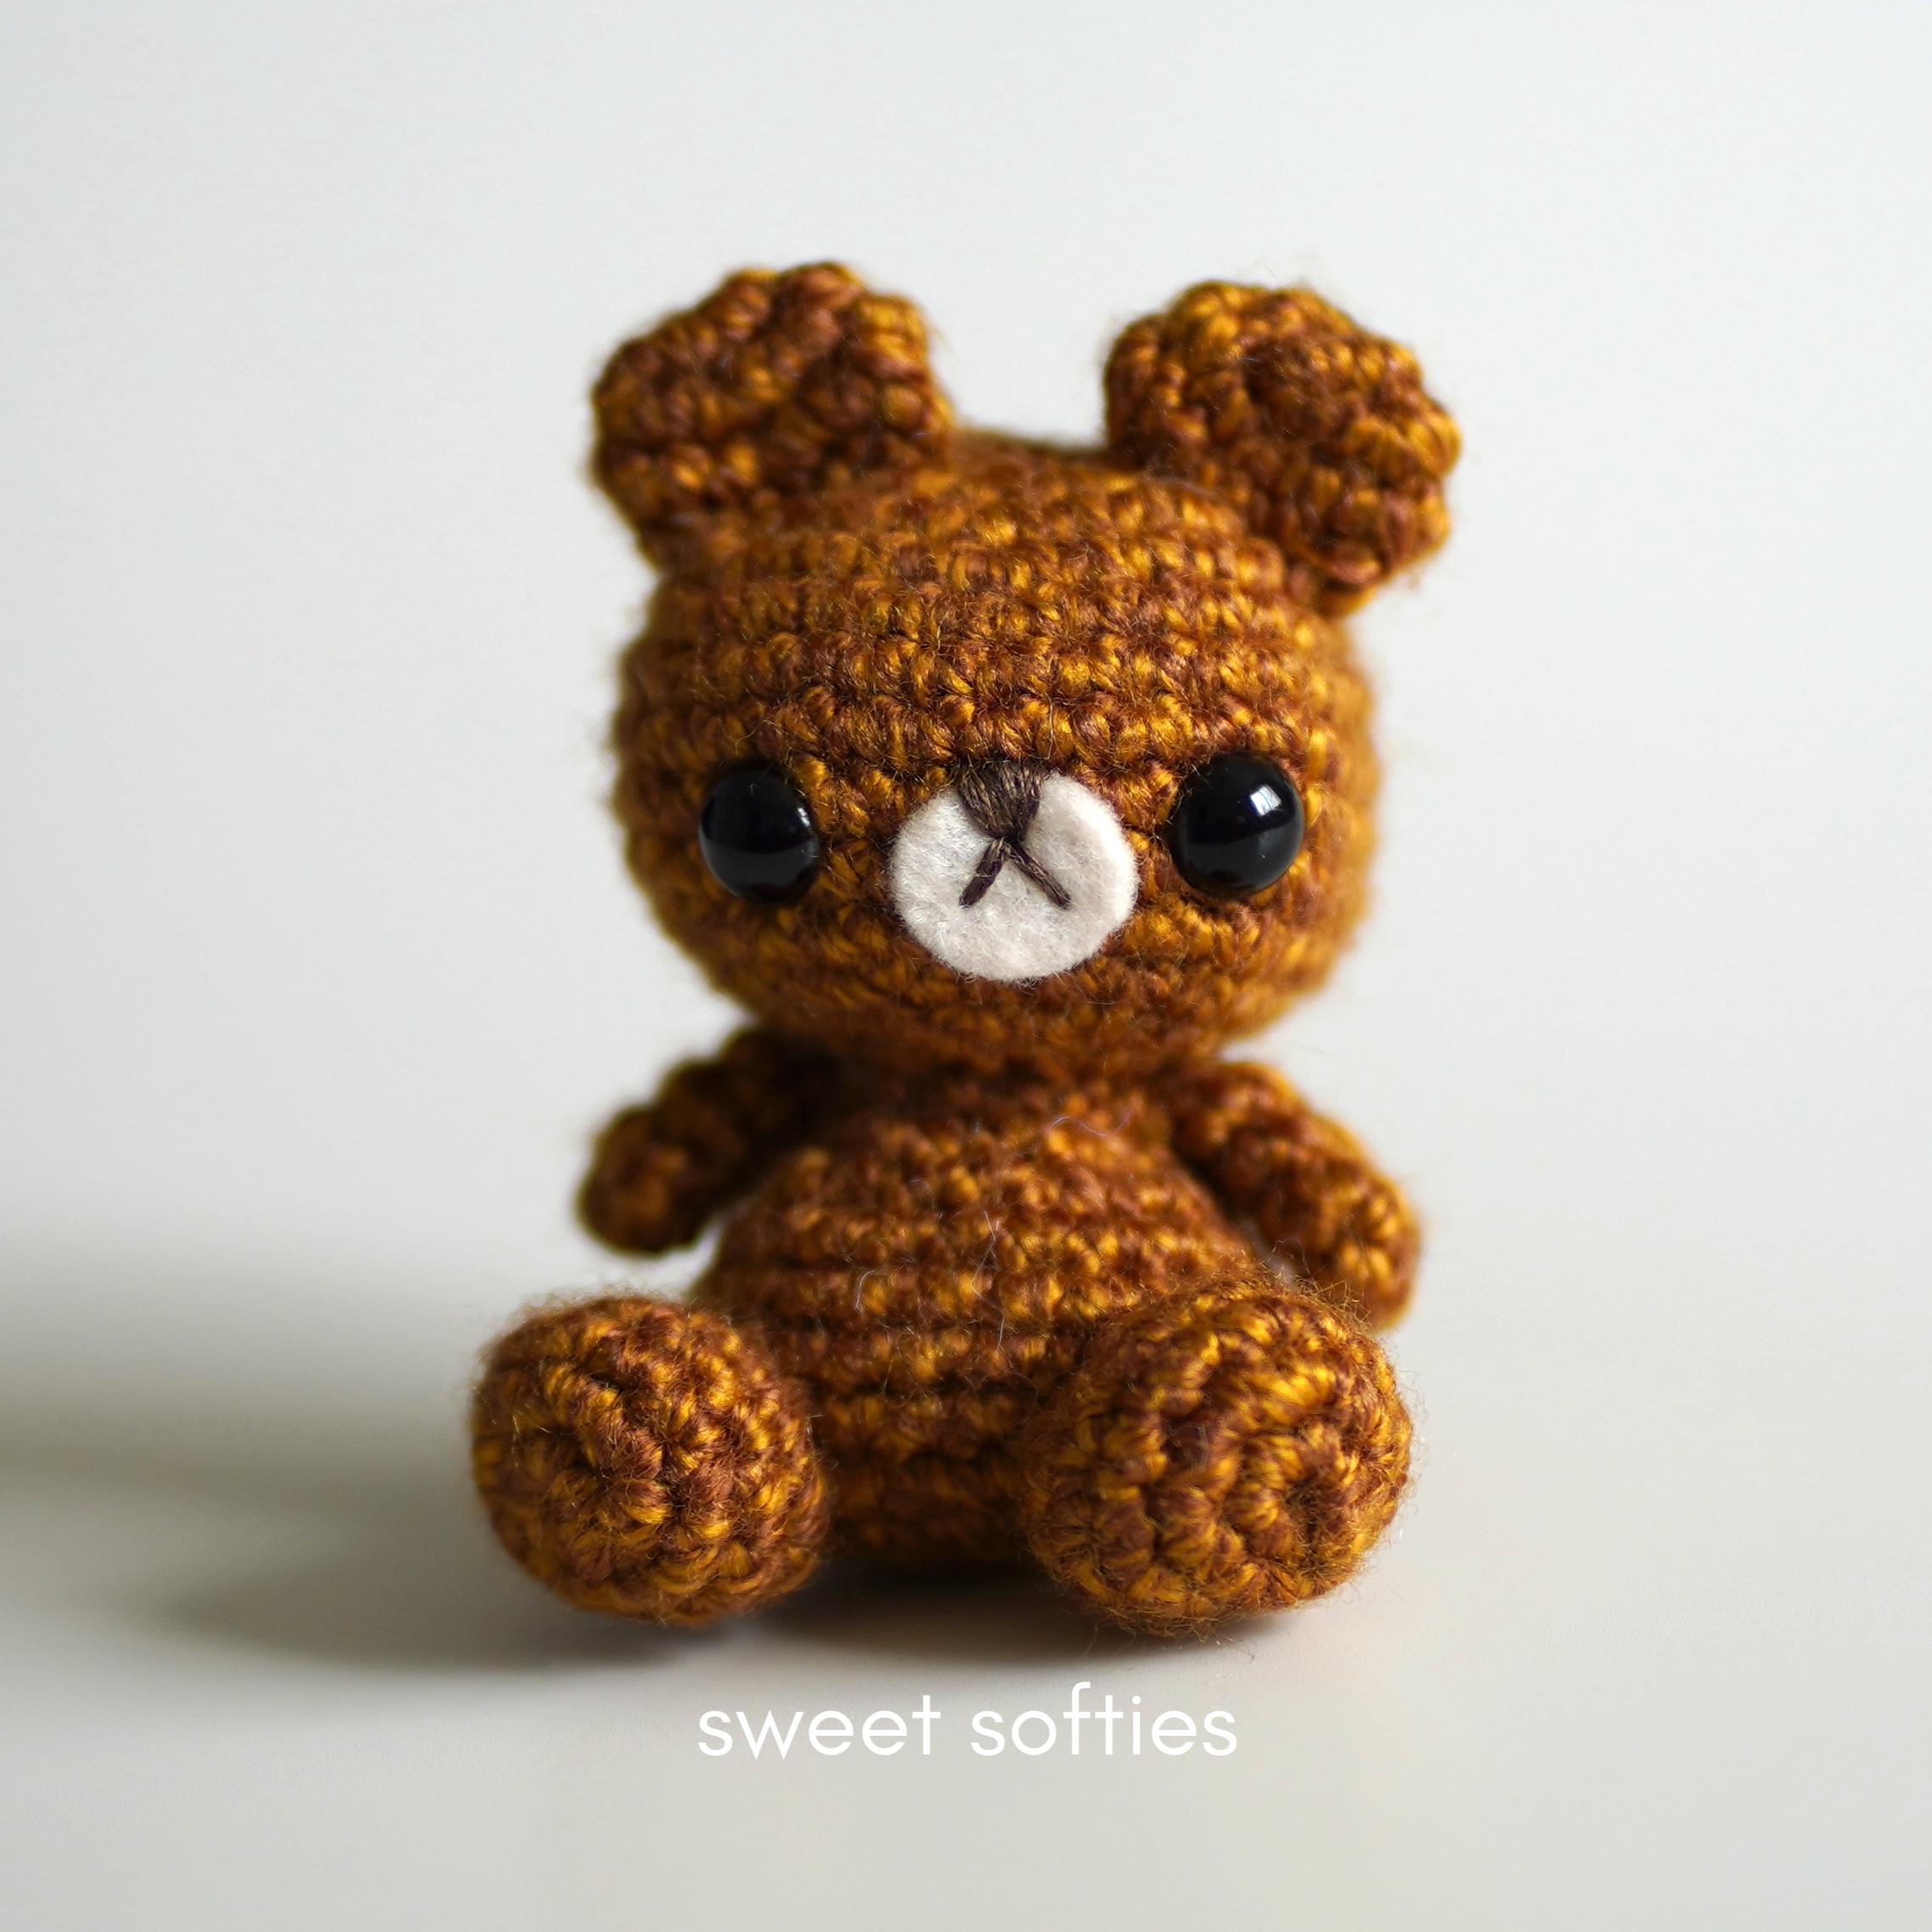
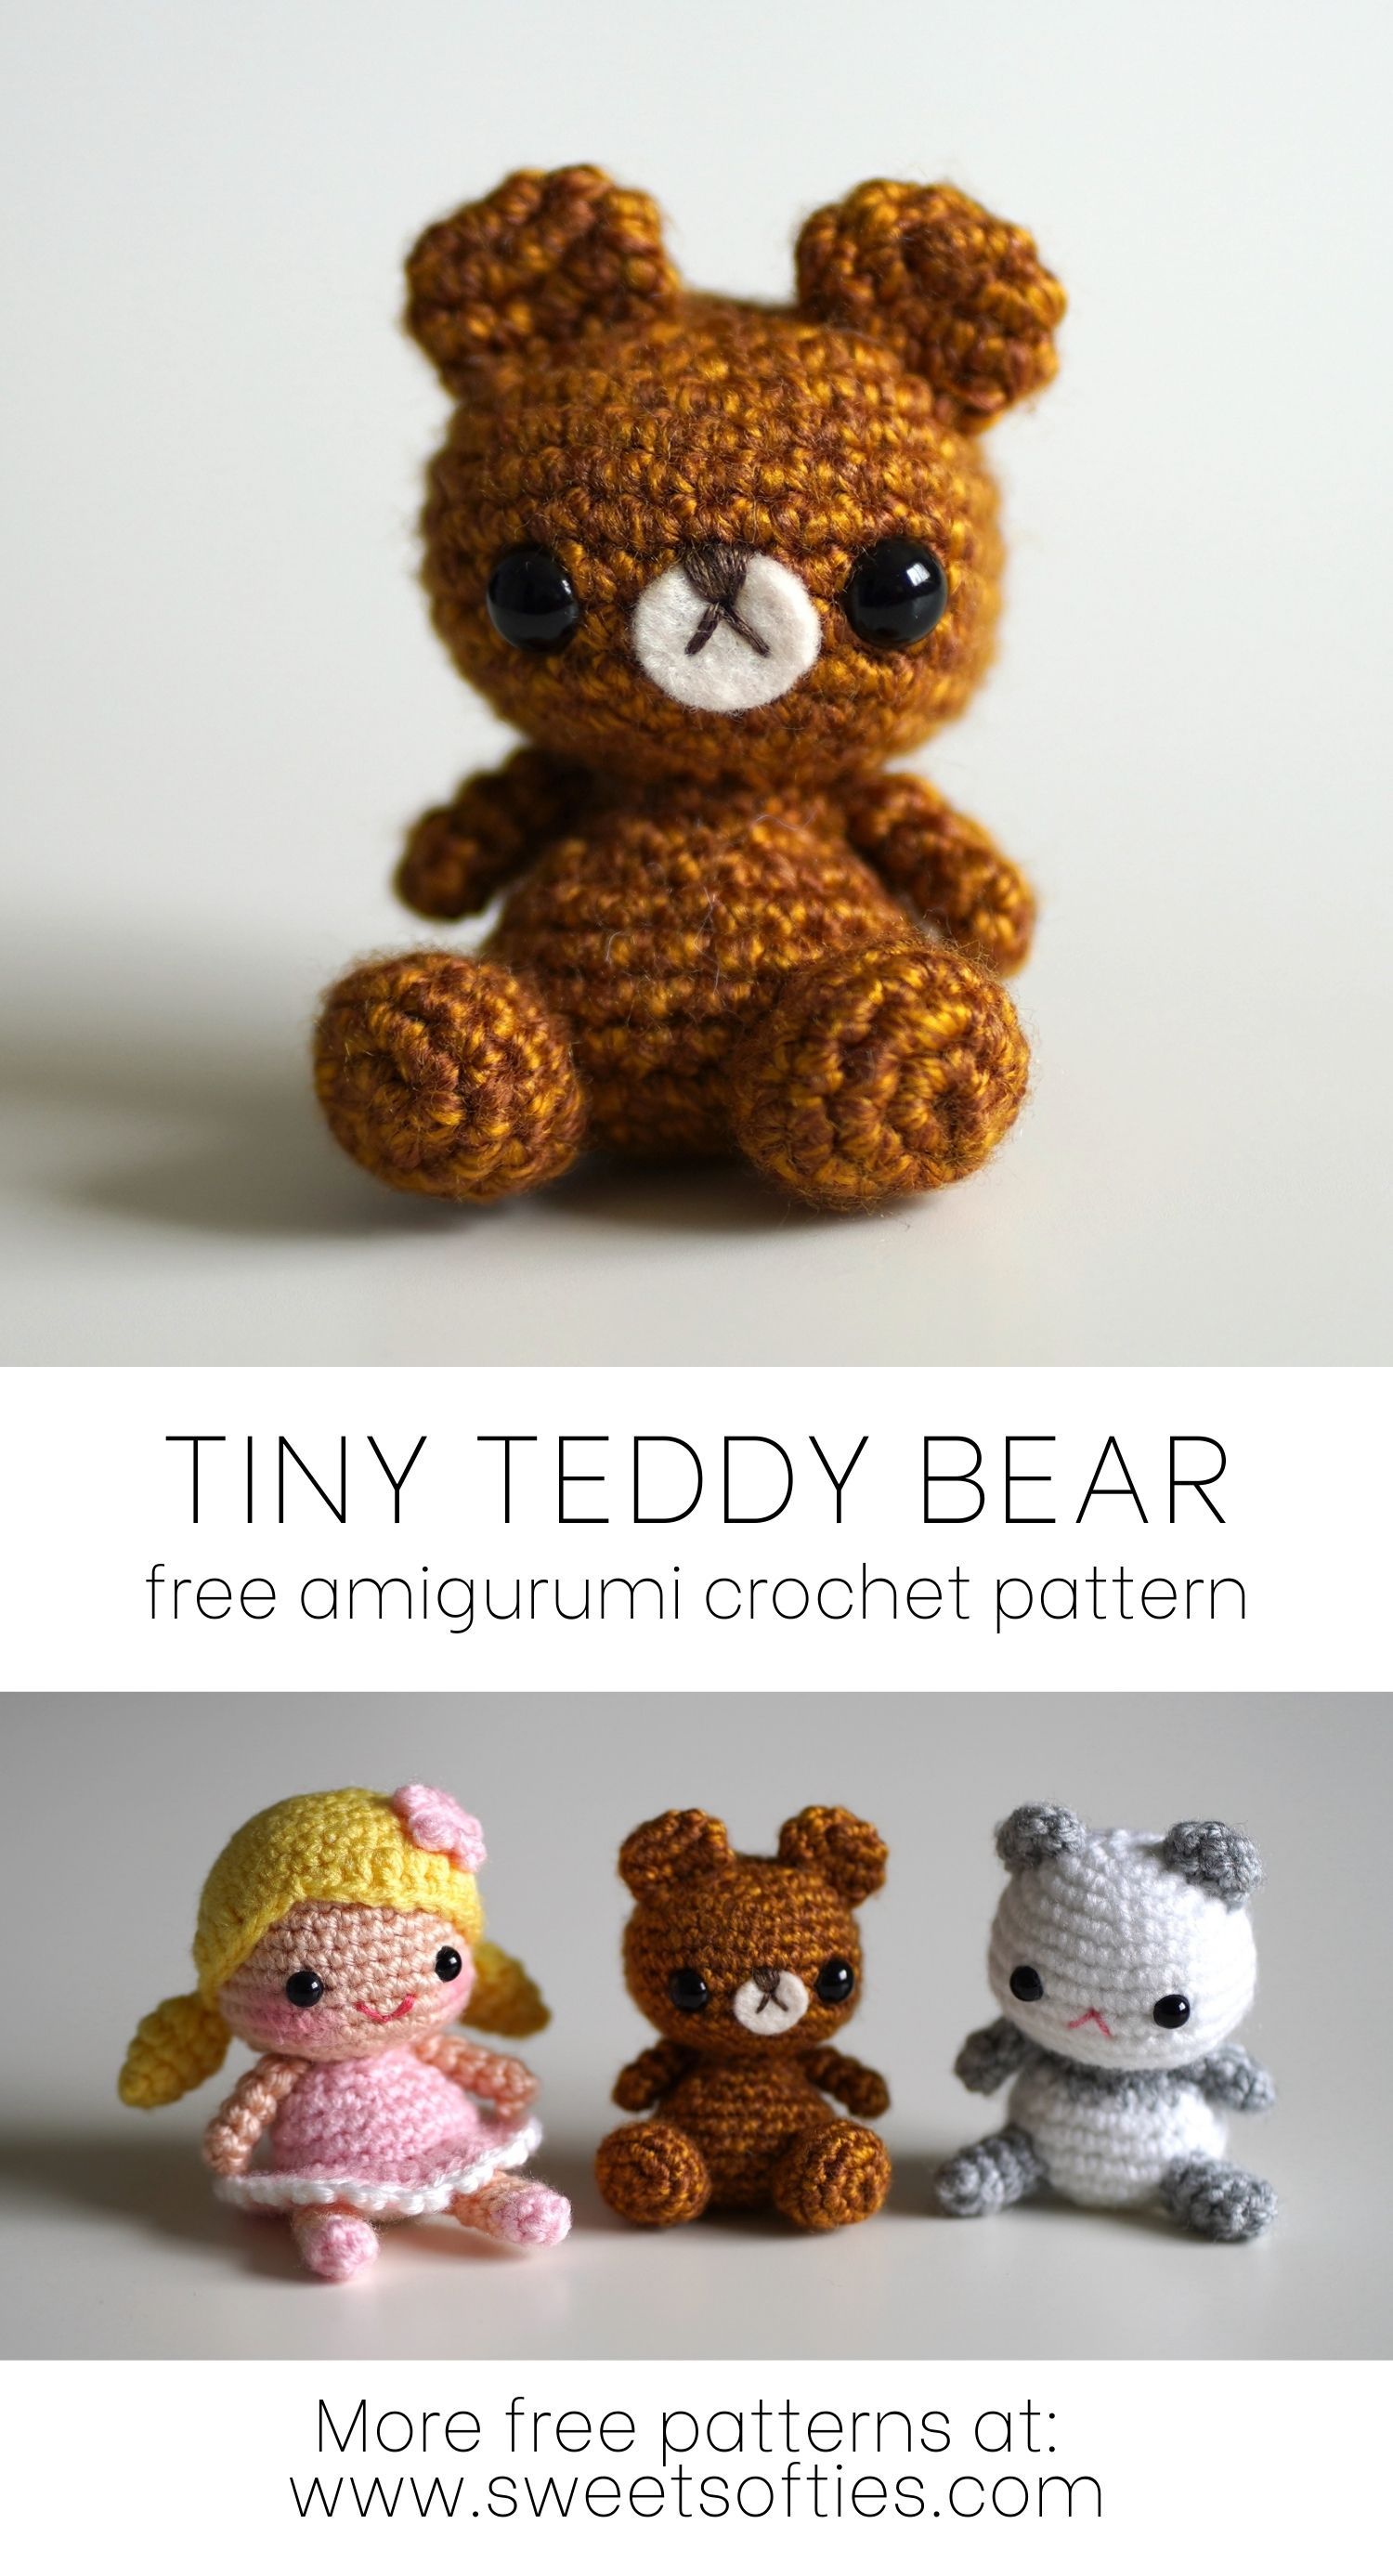
If you're into crocheting tiny amigurumi, you'll love my Tiny Teddy doll! He's the smallest bear I've designed to date, at only 3 inches in height with medium weight yarn. Scroll down to see how tiny he is in my hands, and for the free written pattern instructions to make your own too!
Links:
- Get the PDF pattern on Ravelry or Etsy
- See the finished doll's Preview Video
- Save it on Pinterest
Isn't he so precious? I love how pocket-sized he is, and how he fits into the palms of my hands. Tiny Teddy was made using medium weight yarn, but if you'd like to create an even smaller version of him, just use use thinner yarn (such as DK or fine yarn).

Young children will adore playing with this sweet bear. Given his miniature size, he can even be made into a keychain to gift to older children or teens.
What I love is that the Tiny Teddy is very quick to work up, making him a cute instant-gratification project. He's also very easy to customize with different yarn colors, fibers (try chenille velvet or blanket yarn for a bigger and soft/squishy teddy!), and added embellishments. For example, you can add bow ties, hair bows, buttons, or beads. You can even sew some pretty embroidery details, such as flowers on your mini stuffed animal!
Tiny Teddy is part of my Sitting Dolls Collection. Some of the other members include Little Lucy and Petite Panda (both pictured below). I'm working on additional dolls to add to this collection!

PDF pattern available!
The PDF pattern is printable, ad-free, easy to read, and helps support Sweet Softies! (If you enjoy my free patterns, you can consider it as a donation to me when you buy one of my pattern PDFs! It allows me to maintain my blog and continue sharing more free patterns.)
.jpg)
TINY TEDDY DOLL
Free Amigurumi Crochet Pattern
Terms of Use & Copyright Notice © 2022 Sweet Softies (www.sweetsofties.com). You have permission to sell finished products made from this pattern, but you must credit Sweet Softies as the owner/creator of this pattern by linking to my website (www.sweetsofties.com). No wholesale. You may not translate, copy, alter, or sell my patterns in part or in whole in any way. My patterns may not be used in video tutorials or teaching online classes. My patterns may be used in teaching in-person classes ONLY with written consent from me. You may link to this pattern but you may not copy any part of the pattern instructions on other websites.
Intro:
The Tiny Teddy Bear is a mini amigurumi doll that can sit on its own. It takes after the shape of a classic teddy stuffed animal and works up very quickly and easily. It’s small at only 3” in height and makes a great keychain accessory. This beginner-friendly project does not use any crochet joining methods, so anyone with the basic knowledge of magic rings, single crochets, increase, and decreases, will be able to make this bear! Customize it with different yarn colors, fibers, and weights (try it with velvet or blanket yarn!) or with embellishments such as buttons, bows, bow ties, or flowers. It makes a great birthday or holiday gift for both children and adults alike.Size:
Height: 3 inches (7.5 cm)
Level of Difficulty:
★☆☆☆☆ Beginner. Requires familiarity with stitches used (below) and sewing parts together.
Stitches/Terms Used:
- FO = fasten off
- MR = magic ring
- sc = single crochet
- inc = increase
- dec = decrease
Materials:
- Medium weight yarn in desired color
Recommended yarn: Lion Brand Heartland, Brava Worsted, 24/7 Cotton - Scrap of felt for the muzzle
- Embroidery thread for sewing the nose and mouth
- 8mm plastic safety eyes (x2)
- 2.75mm crochet hook
- Stuffing
- Yarn needle
- Scissors

Notes:
- A Preview Video of the finished doll is available.
- Printable and ad-free pattern instructions can be downloaded on
- Ravelry or Etsy.
HEAD
R1: Insert 6 sc in MR. Pull ring tight. (6 sts)R2: Inc around. (12 sts)
R3: (Sc, inc) x 6. (18 sts)
R4: (Sc 2, inc) x 6. (24 sts)
R5: (Sc 3, inc) x 6. (30 sts)
R6: (Sc 9, inc) x 3. (33 sts)
R7-R10: Sc around. (33 sts)
R11: (Sc 9, dec) x 3. (30 sts)
R12: (Sc 3, dec) x 6. (24 sts)
Attach 8mm eyes between R9-R10, 7 sts apart.
R13: (Sc 2, dec) x 6. (18 sts)
R14: (Sc, dec) x 6. (12 sts)
FO; you will weave this yarn tail in later.
EARS (x2)
R1: Insert 6 sc in MR. Pull ring tight. (6 sts)R2: Inc around. (12 sts)
R3: Sc around. (12 sts)
FO with a long tail for sewing to the head later.
ARMS (x2)
R1: Insert 5 sc in MR. Pull ring tight. (5 sts)R2-R4: Sc around. (5 sts)
FO with a long tail for sewing to the body later.
BODY
R1: Insert 6 sc in MR. Pull ring tight. (6 sts)R2: Inc around. (12 sts)
R3: (Sc, inc) x 6. (18 sts)
R4: (Sc 2, inc) x 6. (24 sts)
R5-R8: Sc around. (24 sts)
R9: (Sc 2, dec) x 6. (18 sts)
R10: (Sc, dec) x 6. (12 sts)
FO with a long tail for sewing to the head later.
LEGS (x2)
R1: Insert 6 sc in MR. Pull ring tight. (6 sts)R2: Inc around. (12 sts)
R3-R5: Sc around. (12 sts)
FO with a long tail for sewing to the body later.

- Cut out a small circle of light-colored felt for the bear’s muzzle. Place it between the bear’s eyes. Using embroidery thread and a needle, sew the nose and mouth shape to the muzzle. As you do so, insert your needle through both the muzzle and head, so that you are sewing the two pieces together.
- Stuff the head, body, and two legs.
- Sew the two arms to R10 of the body.
- Position the legs in front of the body so that your bear is in the sitting position. Sew the legs to the body.
- Sew the two ears to the top of the bear’s head.
- Sew the head to the body.
Congratulations on finishing your Tiny Teddy!
Thank you for reading, and hope you have a fun time crocheting this project! If you'd like to help out my blog, feel free to check out my post, "5 Ways to Support my Blog!"
You might like my other designs if you enjoyed this one! Simply click on the image below for the pattern, or check out all my free patterns here.


I'd love to see your finished work from my designs! Here are links for sharing photos of your creations:
Best wishes,

.jpg)


This is very cute! I love how the teddy sits up so nicely :)
ReplyDeleteCurrently, plagiarism in essays is very easy to detect, and hence instructors are ready to penalise students who turn in plagiarised https://expertpaperwriter.com/unemployed-professors-review/ work. Punishments may go to the extreme of suspension or even expulsion depending on the type of paper.
ReplyDeleteThis comment has been removed by the author.
ReplyDeleteI didn’t have any expectations concerning that title, but the more I was astonished. The author did a great job. I spent a few minutes reading and checking the facts. Everything is very clear and understandable. I like posts that fill in your knowledge gaps. This one is of the sort.
ReplyDelete