


Have you ever crocheted with beads before? It’s such a lovely addition to crochet projects, especially if you’re making some cute jewelry or accessories! Trying new things makes your life better, but it's hard to do if you're a student. A lot of assignments and textbooks take up all your time and leave you with nothing else to do, but don't get frustrated ahead of time. You can always buy essays without spending a lot of time and effort, you will get a high grade and you can try something new in the process.
I’m hooked on this new design of mine, which is a single pattern that can be adapted to make different types of jewelry or even accessories. Check out what it can be used for below!
This single pattern can be used to make...
- Bracelets
- Necklaces
- Choker necklaces or collars
- Belt
- Belly dance hip scarf
- Hair accessories
- ...and more!
One great thing about crocheting jewelry is that it is SO quick to work up. There aren't many total stitches for each project.
It also makes a great gift for friends and family, as it's not only super fast to work up but so easily customizable too. You can customize this design using different yarn colors, yarn fibers, hook sizes, and beads. These different materials will yield unique results!
You can PIN this pattern for later on your crochet board~
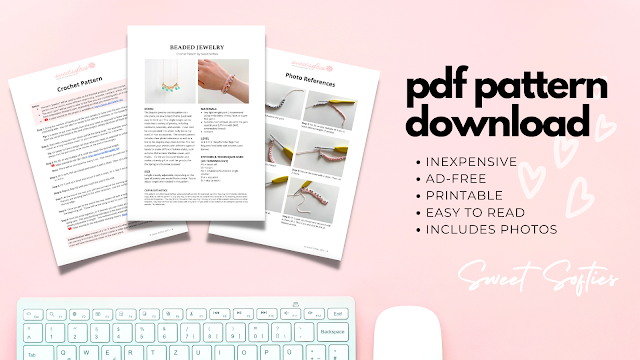
Want the PDF pattern?
The PDF pattern is printable, ad-free, easy to read, and includes photo references. Your purchase helps support Sweet Softies! (If you enjoy my free patterns, you can consider it as a donation to me when you buy one of my pattern PDFs! It allows me to maintain my blog and continue sharing more free patterns.)
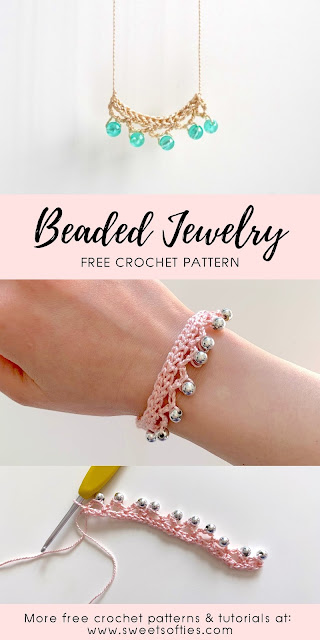
Crochet Beaded Jewelry
Free Crochet Pattern
Terms of Use & Copyright Notice © 2022 Sweet Softies (www.sweetsofties.com). You have permission to sell finished products made from this pattern, but you must credit Sweet Softies as the owner/creator of this pattern by linking to my website (www.sweetsofties.com). No wholesale. You may not translate, copy, alter, or sell my patterns in part or in whole in any way. My patterns may not be used in video tutorials or teaching online classes. My patterns may be used in teaching in-person classes ONLY with written consent from me. You may link to this pattern but you may not copy any part of the pattern instructions on other websites.
Intro:
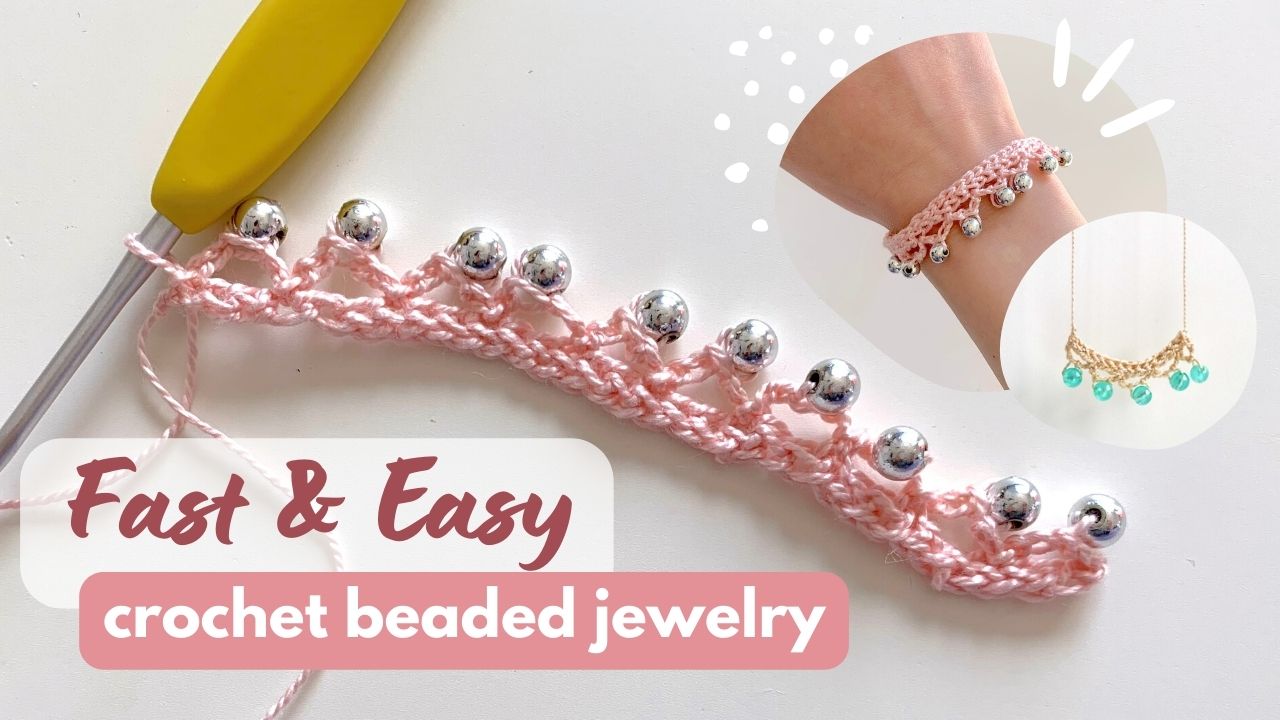
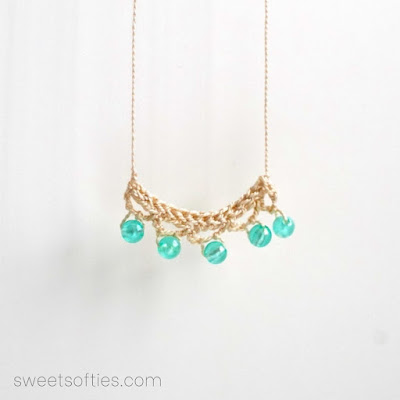
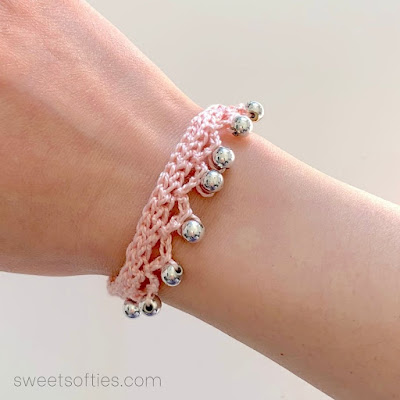
The Beaded Jewelry crochet pattern is a one-piece, no-sew project that is quick and easy to work up! This single design can be made into a variety of jewelry, including necklaces, bracelets, anklets, chokers, and collars. It can even be incorporated into a belt, belly dance hip scarf, or hair accessories. The written pattern includes clear photo references as well as a link to the step-by-step video tutorial. You can customize your jewelry with different types of beads to create different fashion styles, such as boho (Bohemian), Mediterranean, and Arabic. It is the perfect stash buster and makes a trendy gift or craft fair product for the Spring and Summer seasons!Size:
Length is easily adjustable, depending on the type of jewelry you would like to create. Tips to adjust length are included in the pattern.
Level of Difficulty:
★★☆☆☆ Easy/Familiar Beginner.
Requires familiarity with stitches used (below).
Stitches/Terms Used:
- FO = fasten off
- Ch = chain
- Fsc = (chainless) foundation single crochet
- Sl st = slip stitch
- Sk = skip (a stitch)
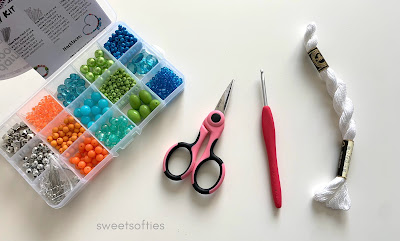
Materials:
- Any light-weight yarn (I recommend using embroidery thread, lace, or super fine yarn)
- Suitable crochet hook size with the yarn used (I used 2.75mm with DMC embroidery thread)
- Beads
- Scissors

Notes: (Please read before beginning!)
- The term “jewelry” will be used to refer to the finished product, since this crochet pattern can be used to make different objects (e.g., bracelet, necklace, anklet, etc.)
- The term “yarn” will be used to refer to the fiber you are crocheting with, as it may vary from embroidery thread to yarn, depending on what you choose to use.
- A video tutorial for this project is available.
- Want photo references? Get the PDF pattern!
Step 1
String the number of beads you’d like your jewelry to have onto the yarn that you are crocheting with. You can add 15+ beads to be safe for a necklace, or 10+ beads for a bracelet.
Tip: It is better to put more beads than what you need, as opposed to fewer beads. If you don’t use up all the beads at the end of the project, simply slip them off from the yarn.
Tip: It is better to put more beads than what you need, as opposed to fewer beads. If you don’t use up all the beads at the end of the project, simply slip them off from the yarn.
Step 2
Start with a long yarn tail, which will be the tying strap. For example, you can make it 10 inches as a long “necklace chain” or you can keep it shorter for a bracelet.
Tip: It’s better to have a longer tail than what you need, as opposed to a shorter tail. You can always trim the yarn ends to be shorter at the end of the project.
Tip: It’s better to have a longer tail than what you need, as opposed to a shorter tail. You can always trim the yarn ends to be shorter at the end of the project.
Step 3
Fsc 30, or any multiple of 3, until you reach the desired length.
Notes:
- If you need help with the fsc stitch, check out my fsc video tutorial.
- There will be one bead for every 3 sts. That means you will use 10 beads with 30 fsc.
Step 4
Ch 2, turn. Pull up a bead and secure it with a chain. Then, ch 2 more. Skip 2 sts and sl st in 3rd st.
Step 5
Ch 2, pull up a bead and secure it with a chain, ch 2. Skip 2 sts and sl st in 3rd st.
Step 6
Repeat Step #5 until you reach the end of the row.

Step 7
At the end of the row, you will have arrived at the starting yarn tail. Turn your piece so that you are working back in the other direction. Use the surface sl st method to sl st across the top edge.
Step 8
Once you get to the end of the row, fasten off with a long yarn tail to match the length of the beginning tail. These will be the tying straps for your jewelry.
Step 9
Knot the ends together, or if desired, you can make an adjustable knotting closure using yarn. This easy knotting technique (video tutorial) at the back of the piece will make the straps for the jewelry adjustable in length. This method works especially well for bracelets.
Customization Idea:
Instead of a “ch 2” before and after securing the bead (in Steps 4-6), you can use any # of chains. More chains creates a wider gap between bead and main piece. Only 1 chain will have the bead sit closer to the main piece.


As always, you are more than welcome to SHARE this post with any fellow crocheters who'd like to try this pattern! Thank you for reading, and I wish you all a wonderful day!

Congratulations on finishing your beaded jewelry!
Thank you for reading, and hope you have a fun time crocheting this project! If you'd like to help out my blog, feel free to check out my post, "5 Ways to Support my Blog!"
You might like my other designs if you enjoyed this one! Simply click on the image below for the pattern, or check out all my free patterns here.
I'd love to see your finished work from my designs! Here are links for sharing photos of your creations:
Best wishes,
.jpg)


It is truly a well-researched content and excellent wording. I got so engaged in this material that I couldn’t wait to read. I am impressed with your work and skill. Thanks. Read more info about Love Engraved Silver Hexagon Necklace
ReplyDeleteExcellent post. I really enjoy reading and also appreciate your work.Quality Handmade Black Onyx Necklace This concept is a good way to enhance knowledge. Keep sharing this kind of articles, Thank you.
ReplyDeleteYou have given great content here.Buy Gold Metal Charms Online in USA I am glad to discover this post as I found lots of valuable data in your article. Thanks for sharing an article like this.
ReplyDeleteI simply want to say I’m beginner to blogging and honestly liked you’re website. Very likely I’m planning to bookmark your website . You actually have superb well written articles. Appreciate it for sharing with us your website.
ReplyDeleteSuper 7 stone
The material in your post is helpful since it provides some of the most up-to-date information accessible. Thank you for sharing about Collateral Loan Boise. Keep up the excellent job.
ReplyDeleteNice info, I am very thankful to you for sharing this important knowledge. This information is helpful for everyone. Read more info about best ring online shopping. So please always share this kind of information. Thanks.
ReplyDeleteClearly, It is an engaging article for us which you have provided here about Jewelry Buyers in Fayetteville Nc. This is a great resource to enhance knowledge about it. Thank you.
ReplyDeleteThanks for your post. It's very helpful post for us. You can also visit Buy Gold Metal Charms Online in USA for more Victor Steel related information. I would like to thanks for sharing this article here.
ReplyDeleteYou have provided a nice article, Thank you very much for this one. And I hope this will be useful for many people. And I am waiting for your next post keep on updating these kinds of knowledgeable things
ReplyDeletefashion jewelry wholesale
Your blog is very valuable which you have shared here about Women Earrings I appreciate your efforts which you have put into this blog and also it is a gainful blog for us. Thank you for sharing this here.
ReplyDeleteYou have shared a magnificent post about Kid Lovely Unicorn Necklace Wholesale. I totally agree with all the points you mentioned here.Thank you for providing such an informative post.
ReplyDeleteThese tips may help me in the future for Amethyst Gemstone Necklace .
ReplyDeleteExtremely useful information which you have shared here about Rainbow Fluorite Necklace. This is a great way to enhance knowledge for us, and also beneficial for us. Thank you for sharing an article like this.
ReplyDeleteVery well written article. It was an awesome article to read. about buy masonic chain collars Complete rich content and fully informative. I totally Loved it.
ReplyDeleteThe blog you have shared is awesome about Anti Hoop Earrings Online In IndiaThis is very useful for us. Thanks for sharing such a good blog.
ReplyDeleteI am thankful to you for sharing this article here. It's a nice article, Which you have shared here. Your article is very informative, and I liked how you expressed your views in this post.Jewelry Buyers in Fayetteville Nc
ReplyDeleteYour blog contains lots of valuable data. It is a factual and beneficial article for us.Sterling Silver Bracelets Thankful to you for sharing an article like this.
ReplyDeleteThis looks absolutely perfect. All these tiny details are made with lot of background knowledge. I like it a lot. fashion jewelry wholesale online
ReplyDeleteI appreciate your efforts which you have put into this article. This post provides a good idea about Barry’s Pawn & Jewelry Genuinely, it is a useful article to increase our knowledge. Thanks for sharing such articles here.
ReplyDeleteThe representation of this article is actually superb. I think this is a genuinely beneficial and instructive article for everyone, I appreciate this kind of writing, Thankful to you for sharing an article like this.Three-Stone Diamond Necklaces
ReplyDeleteArtistic
ReplyDeleteIt is really a helpful blog to find some different source to add my knowledge.
ReplyDeletesunflower and lavender bouquet
This comment has been removed by the author.
ReplyDeleteThis comment has been removed by the author.
ReplyDeleteThis article contains a great deal of significant data. I'm stunned by the nature of the data and furthermore it is a helpful article for us, Thanks for share it.Fine Jewelry Toronto
ReplyDeleteThis comment has been removed by a blog administrator.
ReplyDeleteThis comment has been removed by a blog administrator.
ReplyDelete