


One of the best things about crochet is creating pieces that can do double duty. Even better when they’re practical and adorable enough to display! My newest free pattern, the Rose Bouquet Blanket, checks all those boxes. This design is completely no-sew, beginner-friendly, and works up surprisingly fast thanks to super bulky yarn and a large hook.
Keep scrolling to find the free written pattern instructions below!
The Rose Bouquet Blanket is a charming no-sew crochet pattern featuring three dozen roses beautifully embellishing the edges of a circular blanket. When laid flat, the blanket measures approximately 32 inches across, making it the perfect size for cozy décor, keepsake gifting, or display. One of its most delightful features is that it can be folded into a romantic bouquet shape, transforming a soft blanket into a timeless floral gift.

This unique design makes a thoughtful and memorable present for Valentine’s Day, Mother’s Day, recitals and performances, graduation, birthdays, and just about any holiday where you would normally gift flowers—but with a handmade twist that lasts forever. The Rose Bouquet Blanket is also a wonderful option for selling at craft fairs, as it’s eye-catching, giftable, and sure to stand out among traditional crochet items.
The free version of this pattern below does not include photos, but there is a downloadable, printable, nad ad-free PDF pattern that includes progress photos as part of a detailed photo tutorial! I recommend the PDF pattern for beginners for an easier time following along, and feeling confident every step of the way.
Now, here's a quick look at the blanket!
Gifting
This sweet project would make a lovely gift for:
- Mother's Day
- Valentine's Day
- Birthdays
- Christmas holiday
- Recitals and performances
You can also make these for:
- Charity or Random Acts of Kindness
- Craft fairs and markets

Yarn
The pattern is designed using super bulky weight 6 chenille velvet yarn and a large 9mm hook, allowing the blanket to work up quickly while creating an ultra-soft, plush texture that’s irresistible to touch. I used plush yarns like Honey Bunny and Baby Snuggle yarn.
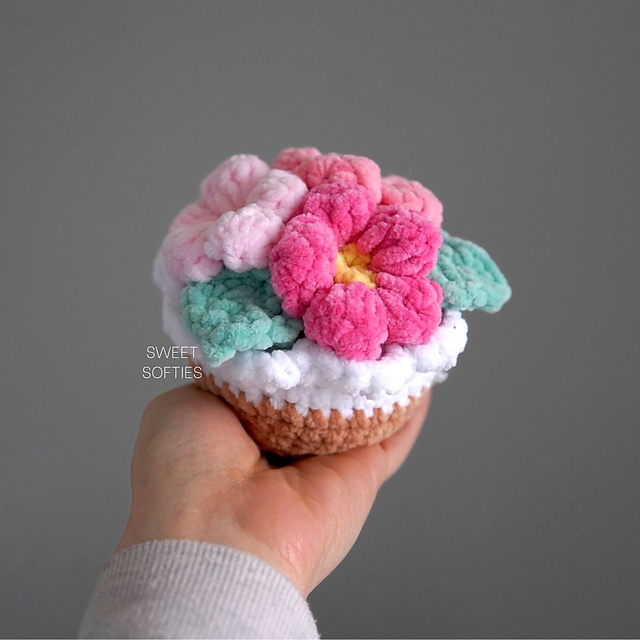
Free Cup Coaster Pattern
Here's a smaller version - a cup coaster! Isn't it so cute? It's quick to make and comes with a small flower pot pattern as well, in which you can put a folded coaster inside to create a "bouquet" effect! If you'd like to make it, be sure to head on over to the Rose Bouquet Coaster free crochet pattern page.

PDF Pattern
The PDF pattern is printable, ad-free, easy to read, includes photo references, and helps support Sweet Softies! (If you enjoy my free patterns, you can consider it as a donation to me when you buy one of my pattern PDFs! It allows me to maintain my blog and continue sharing more free patterns.)

ROSE BOUQUET BLANKET
Free Crochet Pattern
Terms of Use & Copyright Notice © 2025 Sweet Softies (www.sweetsofties.com). You have permission to sell finished products made from this pattern, but you must credit Sweet Softies as the owner/creator of this pattern by linking to my website (www.sweetsofties.com). No wholesale. You may not translate, copy, alter, or sell my patterns in part or in whole in any way. My patterns may not be used in video tutorials or teaching online classes. My patterns may be used in teaching in-person classes ONLY with written consent from me. You may link to this pattern but you may not copy any part of the pattern instructions on other websites.
Crochet Pattern Information
Size:
Approximately 32” across
Level of Difficulty:
★★☆☆☆ Familiar Beginner. Requires familiarity with stitches used (below) and attaching yarn.
Stitches/Terms Used:
- FO = fasten off
- ch = chain
- sp = space
- sl st = slip stitch
- dc = double crochet
- dc-inc = double crochet increase (insert 2 dc in the same st)
Materials:
- Super bulky (weight 6) chenille velvet yarn in desired colors (I used Hobbii Honey Bunny in 1.5 skeins of light pink for the blanket, 0.5 skein of medium pink for the rosehips, 2.5 skeins of red for the roses)
- 9mm crochet hook (these are my fav)
- Scissors

Note: The free written pattern instructions are not printable and do not include photo references. If you would like a printable pattern with photo references, please check out the PDF pattern.
Part 1: BLANKET
Note: The starting chains count as the first dc. Each round is joined with a sl st to the first st (the top of the starting ch). The end-of-round count is the number of dc in each round.Start with light pink yarn.
R1: Ch 4 (counts as first dc). Insert 11 dc in the 4th ch from the hook. *Join with a sl st to the top of the starting ch. (12)
R2: Ch 3, dc in the same st, ch. (Dc-inc, ch) x 11. *Join. (24)
R3: Ch 3, dc-inc in the next st, ch. (Dc, dc-inc, ch) x 11. *Join. (36)
R4: Ch 3, dc in the next st, dc-inc, ch. (Dc 2, dc-inc, ch) x 11. *Join. (48)
R5: Ch 3, dc in each of the next 2 sts, dc-inc, ch. (Dc 3, dc-inc, ch) x 11. *Join. (60)
R6: Ch 3, dc in each of the next 3 sts, dc-inc, ch. (Dc 4, dc-inc, ch) x 11. *Join. (72)
R7: Ch 3, dc in each of the next 4 sts, dc-inc, ch. (Dc 5, dc-inc, ch) x 11. *Join. (84)
R8: Ch 3, dc in each of the next 5 sts, dc-inc, ch. (Dc 6, dc-inc, ch) x 11. *Join. (96)
R9: Ch 3, dc in each of the next 6 sts, dc-inc, ch. (Dc 7, dc-inc, ch) x 11. *Join. (108)
R10: Ch 3, dc in each of the next 7 sts, dc-inc, ch. (Dc 8, dc-inc, ch) x 11. *Join. (120)
R11: Ch 3, dc in each of the next 8 sts, dc-inc, ch. (Dc 9, dc-inc, ch) x 11. *Join. (132)
R12: Ch 3, dc in each of the next 9 sts, dc-inc, ch. (Dc 10, dc-inc, ch) x 11. *Join. (144)
Without FO, continue with the ‘Rosehips’ section.
Part 2: ROSEHIPS
Continue with light pink yarn for the foundation.R1 (foundation): (Ch 5, skip 3 sts, sl st in the 4th st) x 36. Finish the round by inserting a sl st into the first ch-5 space. (36 ch-5 spaces)
Note: Do not count the ch-spaces as a st. You will basically ch 5 and sl st into the 4th, 8th, and 12th st in each of the 12 repetitions.
Switch to medium pink yarn for the rosehips.
R2 (rosehips): (Sl st into the next ch-5 sp. [Ch 3, {dc, ch} x 4, ch 2, sl st] in the same ch-5 space) x 36. Join with a sl st to the first st. (36 “petals”)
FO with a tail and weave in all ends.
Part 3: ROSES
Use red yarn. Opt for multiple shades if desired.R1 (bud): Attach yarn to the first ch sp of a petal. Ch 3, insert 4 dc in the same ch sp. Pull your loop high, then insert hook between the starting ch and the first dc. Pull the active loop through to “bundle” the dc together into a popcorn st. Ch to secure the popcorn.
(Insert 4 dc between the next 2 dc. Pull your loop high, then insert hook between the previous popcorn and the 4 dc you just made. Pull the active loop through to “bundle” the dc together into a popcorn st. Ch to secure the popcorn.) x repeat across until you have 5 popcorns.
Sl st into the first popcorn’s ch, which will “bundle” the 5 popcorns together.
R2 (petals): (Insert a petal* in the same chain space. Sl st into the next ch sp.) x repeat around. (5 petals)
*Petal: Ch, dc 2, ch, sl st in the ch sp.
Tip: The chain space is between each of the popcorn stitches.
FO with a tail and weave in the ends.
Repeat around the blanket until you have a total of 36 flowers.


Lay the blanket flat on a surface and pull the center (R1 of the blanket) up with one hand. The roses can then easily be collected together into a bundle.

Want to share your finished ROSE BOUQUET BLANKET?
I'd love to see it on Instagram, @SweetSofties!
Thank you for reading, and hope you had a fun time crocheting this project! If you'd like to help out my blog, feel free to check out my post, "5 Ways to Support my Blog!"
You might like my other designs if you enjoyed this one! Simply click on the image below for the pattern, or check out all my free patterns here.

I'd love to see your finished work from my designs! Here are links for sharing photos of your creations:
Best wishes,

.jpg)


