


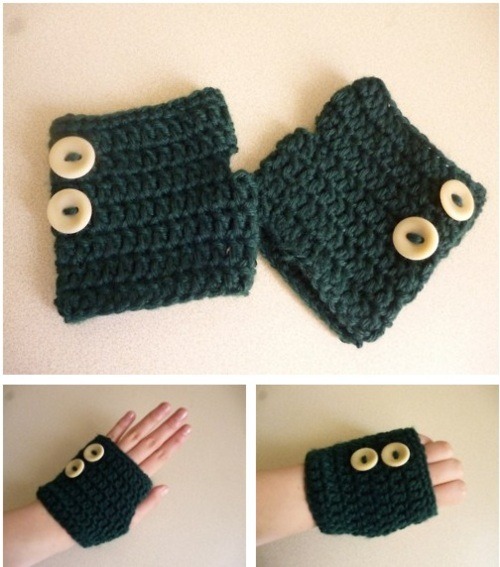
These mittens are cute as a button and soft as a kitten! They are made from bottom to top, and is worked in the round. This is a very EASY and QUICK project, with no sewing required. (That is, unless you would like to attach buttons and/or other decorative embellishments!)

Materials
- 4.25mm hook
- Caron yarn (Medium weight 4 yarn)
Stitches/Abbreviations Used
- Ch = chain
- Sc = single crochet
- Dc = double crochet
- Sl st = slip stitch
Starting the Mitt (from bottom to top)
- Chain 25 and sl st into first ch, being careful not to twist.
You can do more or less chains depending on how large your hand is. For the ideal # of chains, make sure you are just able to squeeze your complete hand through the circle of chains.
- Ch 3 (this will count as a dc), and start dc on the second st. Continue working in the round.
- At end of round, join first and last st of round with a sl st (insert hook into 3rd ch of previous round).
- Continue steps 2 and 3 until you have 4 rows of dc. End at the sl st and you are now ready to begin creating the thumb hole.
You can have more than 4 rows of dc if you’d like the gloves to be longer and cover the wrist. Just stop at the part where you want the thumb hole to be.
Thumb hole
- Sc into 1st dc. Ch 4, skip 4 dc, and dc into the following dc. Then, continue working in the round.
- At end of round (when you reach the sc before the thumb hole), join the last st with the first st of the previous round with a sl st (insert hook into sc of previous round).
Continuing the Mitt (above the thumb hole)
- Ch 3 and continue dc in next st. (Make sure you work the dc into the 4 ch made for the thumb hole too).
- At end of round, join last st with first st of previous round with a sl st.
- Ch 3, dc around.
- At end of round, join last st with first st of previous round with a sl st.
You may repeat steps 3 and 4 to make a taller mitt. (I usually prefer to have only 2 rows of dc above the thumb.)
- To finish, ch 1 and complete the last round with sc, not dc. This gives the mitt a nicer, more solid edge/brim.
- At end of round, join last st with first st of previous round with a sl st.
And, you are done with one mitt!!! Make sure you make a second one to complete the pair!
Decorative ideas
- Buttons!
- Crocheted flowers!
- Change up the colors of the mitt; switch between different colors to create stripes and designs!
Happy Crocheting!
I hope this pattern is clearly written; if any part of it is not, please let me know so that I can edit it. Thank you!
~~~
This pattern is an original pattern by Sweet Softies (January 2012). Please do not claim this pattern as your own. If you would like to share this pattern, you may provide a link to this pattern but please do not reprint it on your site. You may keep a copy for your own personal use but you may not sell or distribute it, or sell items made from this pattern.
.jpg)


