


Update:
Looking for a comprehensive variety of amigurumi hairstyles for your crochet dolls? Be sure to check out my Best Amigurumi Hairstyles Tutorial post to see all of my personal favorites and learn how to attach hair to recreate those styles by following my doll patterns.
~~~~~
Dear fellow amigurumi enthusiasts,
I'd like to share with you my quick and easy method for attaching hair to my amigurumi dolls! All you'll need is your doll's head and a hair cap, and the rest is easy-peasy!

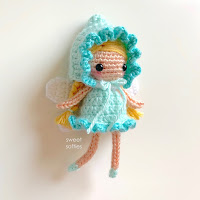
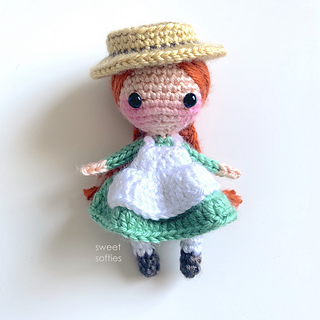
It's a great way to attach hair for dolls with braided hair. It's also suitable for dolls that have something sitting atop their head, such as a flower crown, hat, bow, etcetera. Check out these other dolls that I have, made with the same hair technique!


The step-by-step written instructions below have photos to guide you through the process. However, if you feel that you'd like to see a video tutorial version of this, let me know in the comments section below. If there's enough interest, I'm happy to make a video!

I do want to mention that this is one of my several go-to techniques for attaching hair. I love it for my quick and easy, little dolls. However, for a more complex doll, I prefer giving them a full head of hair to achieve a different look, like for Emerie the Emerald Princess below! If you're interested, check out this blog post for my method on attaching a full head of hair.

Anyhow, I hope you'll find this hair tutorial below to be a fun one! You can PIN this page for later on your Amigurumi or Crochet board.


~ HAIR TUTORIAL ~
1. Have the Hair Cap ready.
Prior to attaching hair, you will need your doll's Head and Hair Cap completed. To make a hair cap, follow pattern instructions for the doll's head but instead of making a full sphere, you will make a semi-sphere by stopping a round or two before the decrease rounds. As an example, this is what a hair cap would look like:
2. Cut strands of yarn that is double the desired hair length.
To make the process quick and easy, you can find an object like a notepad or card that is the desired length, and wrap yarn around it many times. Then, cut across one end of the wrapped yarn and you'll end up with many strands that are doubled the desired hair length.

3. Fold a small bundle (3 strands) in half. Insert hook through a stitch at edge of the hair cap.
4. Pull center of the yarn bundle through the stitch. Put yarn ends through the loop.

5. Pull tightly on yarn ends to secure the strands.
6. Repeat until you are happy with the amount of hair.
I attached 6 bundles total in the example shown below.
7. Sew the hair cap onto the head. If desired, sew bangs onto the doll one strand at a time.

8. Once you are happy with how your doll's bangs look, you are done!
You're welcome to style the doll's hair by braiding it or brushing it out with a dog brush to create a smooth texture.
If you used this tutorial and would like to share photos, I'd absolutely love to see! Here are links for sharing your finished creation:
- Sweet Softies Facebook Page
- Sweet Softies Amigurumi & Crochet Community Facebook Group
- Instagram, @SweetSofties
- Email: sweetsofties [at] gmail.com
Best wishes,

.jpg)

.jpg)